
Photographing a black dog can be a frustrating experience, when I began taking photographs of my black Labrador, Ruby, it was a nightmare! None of my images had detail, Ruby looked like a black blob with no definition. These are the tips I learned to help me obtain gorgeous images of my black dog, I’m hoping they will help you too!
LIGHT – Shooting in the correct light is THE most important tip here. Black fur is just black, it has very little contrast and can cause your cameras focussing system to struggle to achieve focus, continually hunting for contrast to latch onto. Black fur is generally very glossy so avoid taking photographs in direct harsh light, like the midday sun, the hard light will exaggerate the gloss and result in blown highlights in the fur. Soft, diffused light is the best light to bring out the beauty of a black dogs coat.
For the best light in outdoor images you have a couple of choices: just after sunrise, just before sunset, open shade, or a shaded area with bright indirect light and overcast days when the clouds act like a big softbox in the sky.
For indoor images, open up your aperture as much as you can to let more light into your lens and once again, no direct harsh light. Look for bright, soft light at a window or doorway. If one side of the dog is too dark you can always use a reflector (as long as it doesn’t frighten the dog) to reflect the light from the doorway or window onto the dark side of the fur to open up the shadows a little. Always look for natural reflectors too: light coloured furniture, curtains, walls and floors. Make sure that the pooch is looking towards the light in order to provide beautiful catchlights in its eyes.
EXPOSURE – You will need to have your camera on a mode that gives you control over exposure, Aperture priority, Shutter speed priority or Manual mode (Av ,Tv & M are the symbols on a Canon and A, S and M on a Nikon). When you meter off of a black dog, your cameras light meter will tell the camera that the dogs black fur is 18% grey and if you take the shot, your image will be over exposed and way too bright.
There are a couple of ways to overcome that, one way is to meter off of the dog and then simply underexpose the image by about 2 stops. My favorite way is to shoot in Manual mode: I first meter off of something resembling middle grey, adjust my settings accordingly, then refocus on the dog ignoring the new light meter reading and just shoot. Always check your histogram to make sure you are happy with the exposure.
FOCUS – Focus on the eyes and try to get them tack sharp. Some black dogs, like my girl Ruby here, have lovely amber coloured eyes which provide contrast and give your cameras focussing system something to grab onto.
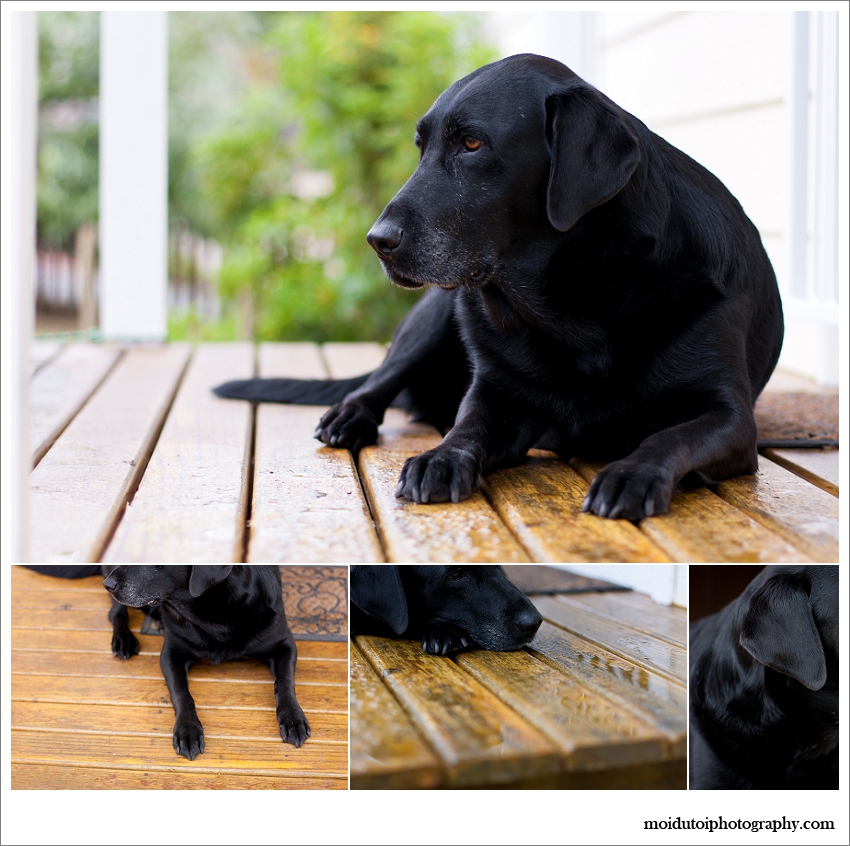
The above images of Ruby were taken on an overcast day with her lying on the covered front porch of our house facing out, the door behind her is white.
BACKGROUND – Avoid white backgrounds as they will drive your camera nuts! Try to photograph the dog against a neutral background that will isolate it and make it stand out, for example, green grass or a red carpet. If the background is ugly or too busy, another way to isolate your subject would be to shoot with a wide aperture and get in close to the animal to shoot, this will provide you with a shallow depth of field and a beautiful bokeh in the background. Remember the closer you are to your subject the shallower your depth of field will be.
POST PROCESSING – Shoot in RAW, that way you will have lots more control over the final image. Sometimes a black dog will have a blue “cast” on the fur, the way to counteract this if you post process your images in Lightroom, is to use the blue saturation slider in the HSL module to desaturate the fur until the image looks good.
If you have important areas of blue in the image, a blue shirt or sky for example, then simply use the adjustment brush instead. Brush onto the fur and drag the saturation slider to the left until you are happy with the result. Don’t go overboard, keep using your before and after button to see how you are doing, less is more!
All my love
moi ♥

Such a fabulous and informative post friendy. I was just saying to Pete yesterday evening I need to run through my notes again.
🙂 Mandy xo
LikeLike
Thanks Mandiferous 🙂
LikeLike
I’ll have to practice on my black cats. Thanks for the info.
LikeLike
Big pleasure ♥
LikeLike
Great tips! I’ve learned a lot along the way photographing my black pup!
LikeLike
Aw! She is a sweetie your fur baby, lovely eyes
LikeLike